Spring Boot化
在 Spring 项目中实现化,通常需要以下 3 步:
编写化资源(配置)文件;
使用 ResourceBundleMessageSource 管理化资源文件;
在页面获取化内容。
1. 编写化资源文件
在 Spring Boot 的类路径下创建化资源文件,文件名格式为:基本名_语言代码_国家或地区代码,例如 login_en_US.properties、login_zh_CN.properties。以 spring-boot-springmvc-demo1为例,在 src/main/resources 下创建一个 i18n 的目录,并在该目录中按照化资源文件名格式分别创建以下三个文件,
login.properties:无语言设置时生效
login_en_US.properties :英语时生效
login_zh_CN.properties:中文时生效
以上化资源文件创建完成后,IDEA 会自动识别它们,并转换成如下的模式:

图1:化资源文件
打开任意一个化资源文件,并切换为 Resource Bundle 模式,然后点击“+”号,创建所需的化属性,如下图。
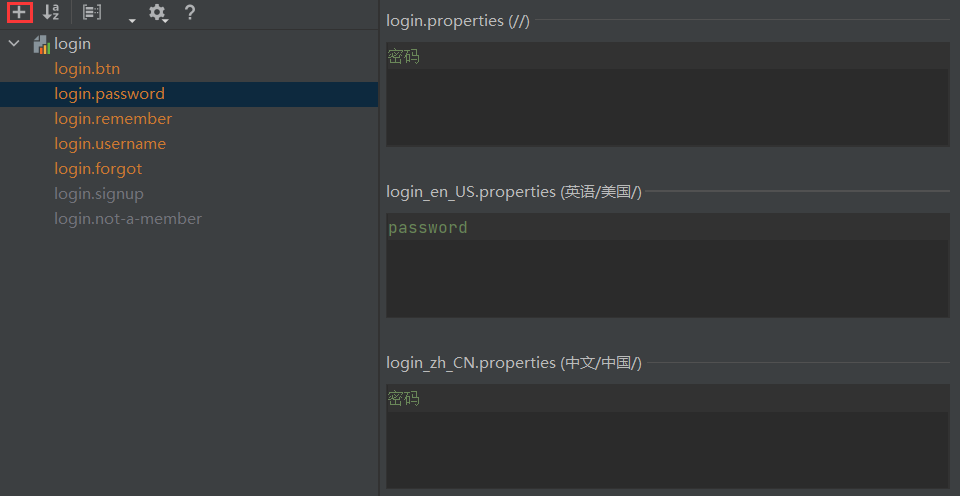
图2:编辑化资源文件
2. 使用 ResourceBundleMessageSource 管理化资源文件
Spring Boot 已经对 ResourceBundleMessageSource 提供了默认的自动配置。Spring Boot 通过 MessageSourceAutoConfiguration 对 ResourceBundleMessageSource 提供了默认配置,其部分源码如下。
@Configuration(proxyBeanMethods = false)
@ConditionalOnMissingBean(name = AbstractApplicationContext.MESSAGE_SOURCE_BEAN_NAME, search = SearchStrategy.CURRENT)
@AutoConfigureOrder(Ordered.HIGHEST_PRECEDENCE)
@Conditional(org.springframework.boot.autoconfigure.context.MessageSourceAutoConfiguration.ResourceBundleCondition.class)
@EnableConfigurationProperties
public class MessageSourceAutoConfiguration {
private static final Resource[] NO_RESOURCES = {};
// 将 MessageSourceProperties 以组件的形式添加到容器中
// MessageSourceProperties 下的每个属性都与以 spring.messages 开头的属性对应
@Bean
@ConfigurationProperties(prefix = "spring.messages")
public MessageSourceProperties messageSourceProperties() {
return new MessageSourceProperties();
}
//Spring Boot 会从容器中获取 MessageSourceProperties
// 读取化资源文件的 basename(基本名)、encoding(编码)等信息
// 并封装到 ResourceBundleMessageSource 中
@Bean
public MessageSource messageSource(MessageSourceProperties properties) {
ResourceBundleMessageSource messageSource = new ResourceBundleMessageSource();
//读取化资源文件的 basename (基本名),并封装到 ResourceBundleMessageSource 中
if (StringUtils.hasText(properties.getBasename())) {
messageSource.setBasenames(StringUtils
.commaDelimitedListToStringArray(StringUtils.trimAllWhitespace(properties.getBasename())));
}
//读取化资源文件的 encoding (编码),并封装到 ResourceBundleMessageSource 中
if (properties.getEncoding() != null) {
messageSource.setDefaultEncoding(properties.getEncoding().name());
}
messageSource.setFallbackToSystemLocale(properties.isFallbackToSystemLocale());
Duration cacheDuration = properties.getCacheDuration();
if (cacheDuration != null) {
messageSource.setCacheMillis(cacheDuration.toMillis());
}
messageSource.setAlwaysUseMessageFormat(properties.isAlwaysUseMessageFormat());
messageSource.setUseCodeAsDefaultMessage(properties.isUseCodeAsDefaultMessage());
return messageSource;
}
...
}
从以上源码可知:
Spring Boot 将 MessageSourceProperties 以组件的形式添加到容器中;
MessageSourceProperties 的属性与配置文件中以“spring.messages”开头的配置进行了绑定;
Spring Boot 从容器中获取 MessageSourceProperties 组件,并从中读取化资源文件的 basename(文件基本名)、encoding(编码)等信息,将它们封装到 ResourceBundleMessageSource 中;
Spring Boot 将 ResourceBundleMessageSource 以组件的形式添加到容器中,进而实现对化资源文件的管理。
查看 MessageSourceProperties 类,其代码如下。
public class MessageSourceProperties {
private String basename = "messages";
private Charset encoding;
@DurationUnit(ChronoUnit.SECONDS)
private Duration cacheDuration;
private boolean fallbackToSystemLocale;
private boolean alwaysUseMessageFormat;
private boolean useCodeAsDefaultMessage;
public MessageSourceProperties() {
this.encoding = StandardCharsets.UTF_8;
this.fallbackToSystemLocale = true;
this.alwaysUseMessageFormat = false;
this.useCodeAsDefaultMessage = false;
}
...
}
通过以上代码,我们可以得到以下 3 点信息:
MessageSourceProperties 为 basename、encoding 等属性提供了默认值;
basename 表示化资源文件的基本名,其默认取值为“message”,即 Spring Boot 默认会获取类路径下的 message.properties 以及 message_ X.properties 作为化资源文件;
在 application.porperties/yml 等配置文件中,使用配置参数“spring.messages.basename”即可重新指定化资源文件的基本名。
通过以上源码分析可知,Spring Boot 已经对化资源文件的管理提供了默认自动配置,我们这里只需要在 Spring Boot 全局配置文件中,使用配置参数“spring.messages.basename”指定我们自定义的资源文件的基本名即可,代码如下(当指定多个资源文件时,用逗号分隔)。
spring.messages.basename=i18n.login
3. 获取化内容
由于页面使用的是 Tymeleaf 模板引擎,因此我们可以通过表达式 #{...} 获取化内容。以 spring-boot-adminex 为例,在 login.html 中获取化内容,代码如下。
<!DOCTYPE html>
<html lang="en" xmlns:th="http://www.thymeleaf网站站点" rel="nofollow" />
图3:中文登陆页
将浏览器语言切换为英文,再次访问登陆页,结果如下图。
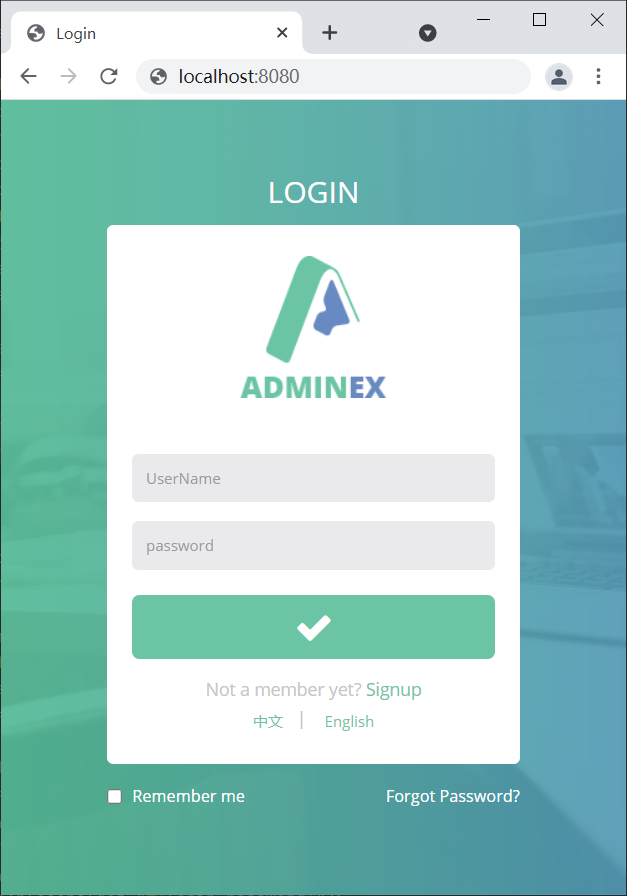
图4:英文登录页(猛击图片,查看原图)
手动切换语言
如下图所示,在登陆页(login.html)最下方有两个切换语言的链接,想要通过点击它们来切换进行化的语言,该怎么做呢?
图5:切换语言按钮
区域信息解析器自动配置
我们知道,Spring MVC 进行化时有 2 个十分重要的对象:
Locale:区域信息对象
LocaleResolver:区域信息解析器,容器中的组件,负责获取区域信息对象
我们可以通过以上两个对象对区域信息的切换,以达到切换语言的目的。
Spring Boot 在 WebMvcAutoConfiguration 中为区域信息解析器(LocaleResolver)进行了自动配置,源码如下。
@Bean
@ConditionalOnMissingBean(name = DispatcherServlet.LOCALE_RESOLVER_BEAN_NAME)
@SuppressWarnings("deprecation")
public LocaleResolver localeResolver() {
if (this.webProperties.getLocaleResolver() == WebProperties.LocaleResolver.FIXED) {
return new FixedLocaleResolver(this.webProperties.getLocale());
}
if (this.mvcProperties.getLocaleResolver() == WebMvcProperties.LocaleResolver.FIXED) {
return new FixedLocaleResolver(this.mvcProperties.getLocale());
}
AcceptHeaderLocaleResolver localeResolver = new AcceptHeaderLocaleResolver();
Locale locale = (this.webProperties.getLocale() != null) ? this.webProperties.getLocale()
: this.mvcProperties.getLocale();
localeResolver.setDefaultLocale(locale);
return localeResolver;
}
从以上源码可知:
该方法默认向容器中添加了一个区域信息解析器(LocaleResolver)组件,它会根据请求头中携带的“Accept-Language”参数,获取相应区域信息(Locale)对象。
该方法上使用了 @ConditionalOnMissingBean 注解,其参数 name 的取值为 localeResolver(与该方法注入到容器中的组件名称一致),该注解的含义为:当容器中不存在名称为 localResolver 组件时,该方法才会生效。换句话说,当我们手动向容器中添加一个名为“localeResolver”的组件时,Spring Boot 自动配置的区域信息解析器会失效,而我们定义的区域信息解析器则会生效。
手动切换语言
1. 修改 login.html 切换语言链接,在请求中携带化区域信息,代码如下。
<!--thymeleaf 模板引擎的参数用()代替 ?-->
<a class="btn btn-" th:href="@{/index.html(l='zh_CN')}">中文</a>|
<a class="btn btn-" th:href="@{/index.html(l='en_US')}">English</a>
2. 在 net.biancheng.www 下创建一个 component 包,并在该包中创建一个区域信息解析器 MyLocalResolver,代码如下。
package net.biancheng.ww网站站点" rel="nofollow" />
//将自定义的区域信息解析器以组件的形式添加到容器中
@Bean
public LocaleResolver localeResolver(){
return new MyLocalResolver();
}
4. 启动 Spring Boot,访问登录页 login.html,结果如下图。
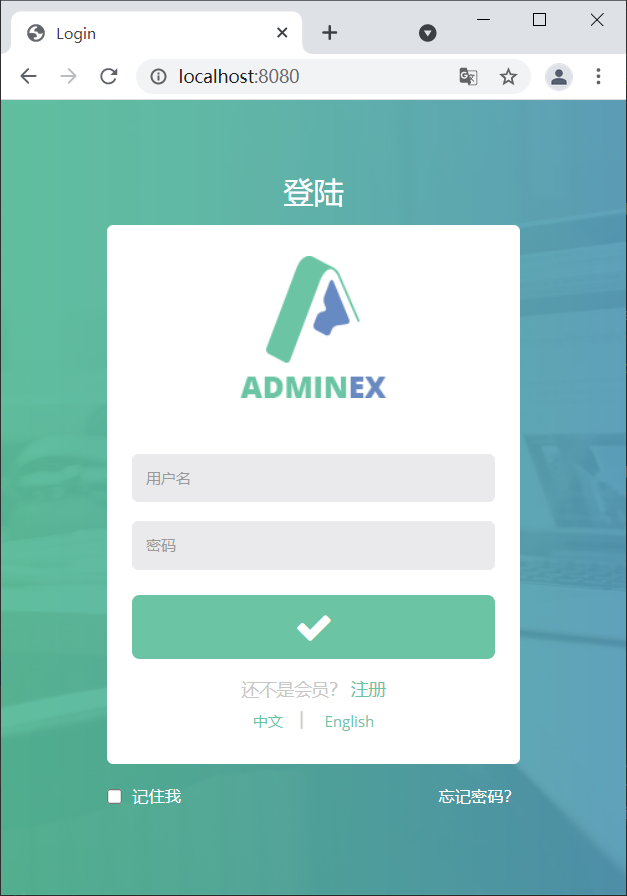
图6:默认登陆页
5. 点击页面最下方的“English”链接,将语言切换到英语,结果如下图。
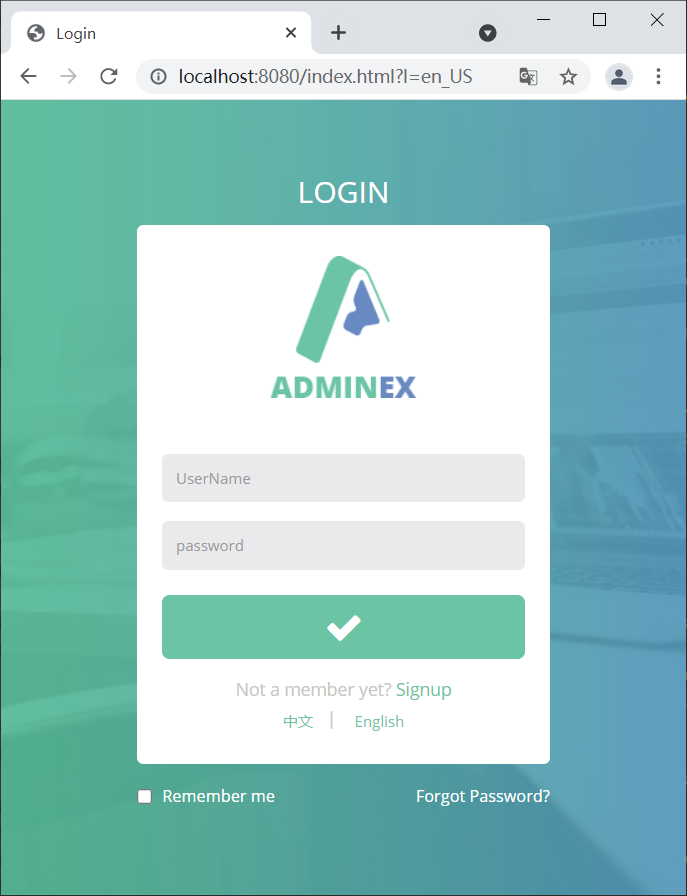
图7:切换国家化语言为英语
6. 点击页面最下方的“中文”链接,将语言切换到中文,结果如下图。

图8:切换语言为中文