Spring Boot注册Web原生组件(Servlet、Filter、Listener)
通过组件扫描注册
使用 RegistrationBean 注册
通过组件扫描注册
Servlet 3.0 提供了以下 3 个注解:
@WebServlet:用于声明一个 Servlet;
@WebFilter:用于声明一个 Filter;
@WebListener:用于声明一个 Listener。
这些注解可直接标注在对应组件上,它们与在 web.xml 中的配置意义相同。每个注解都具有与 web.xml 对应的属性,可直接配置,省去了配置 web.xml 的繁琐。
想要在 SpringBoot 中注册这些原生 Web 组件,可以使用 @ServletComponentScan 注解实现,该注解可以扫描标记 @WebServlet、@WebFilter 和 @WebListener 三个注解的组件类,并将它们注册到容器中。
注意:@ServletComponentScan 注解只能标记在启动类或配置类上。
示例
1. 使用 @WebServlet 注解声明一个自定义的 Servlet,代码如下。
package net.biancheng.www.servlet;
import javax.servlet.ServletException;
import javax.servlet.annotation.WebServlet;
import javax.servlet.http.HttpServlet;
import javax.servlet.http.HttpServletRequest;
import javax.servlet.http.HttpServletResponse;
import java.io.IOException;
import java.io.PrintWriter;
//使用 @WebServlet 注解声明一个 Servlet
@WebServlet(name = "myServlet", urlPatterns = "/myServlet")
public class MyServlet extends HttpServlet {
@Override
protected void doGet(HttpServletRequest req, HttpServletResponse resp) throws ServletException, IOException {
doPost(req, resp);
}
@Override
protected void doPost(HttpServletRequest req, HttpServletResponse resp) throws ServletException, IOException {
resp.setContentType("text/html;charset=UTF-8");
PrintWriter writer = resp.getWriter();
writer.write("Spring Boot Servlet");
writer.close();
}
}
2. 使用 @WebFilter 注解声明一个自定义的 Filter,代码如下。
package net.biancheng.www.filter;
import javax.servlet.*;
import javax.servlet.annotation.WebFilter;
import java.io.IOException;
//使用 @WebFilter注解声明一个自定义的 Filter
@WebFilter(urlPatterns = ("/myServlet"))
public class MyFiler implements Filter {
@Override
public void init(FilterConfig filterConfig) throws ServletException {
System.out.println("MyFiler 初始化");
}
@Override
public void doFilter(ServletRequest request, ServletResponse response, FilterChain chain) throws IOException, ServletException {
System.out.println("MyFiler doFilter");
chain.doFilter(request, response);
}
@Override
public void destroy() {
System.out.println("MyFiler 销毁");
}
}
3. 使用 @WebListener 注解声明一个自定义的 Listener,代码如下。
package net.biancheng.www.Listener;
import javax.servlet.ServletContextEvent;
import javax.servlet.ServletContextListener;
import javax.servlet.annotation.WebListener;
//使用 @WebListener 注解声明一个自定义的 Listener
@WebListener
public class MyListener implements ServletContextListener {
@Override
public void contextInitialized(ServletContextEvent sce) {
System.out.println("MyListener 到 ServletContext 初始化");
}
@Override
public void contextDestroyed(ServletContextEvent sce) {
System.out.println("MyListener 到 ServletContext 销毁");
}
}
4. 在启动类上使用 @ServletComponentScan 注解,扫描以上刚刚声明的 Servlet、Filter 和 Listener,并将它们注册到容器中使用,代码如下。
package net.biancheng.www;
import org.springframework.boot.SpringApplication;
import org.springframework.boot.autoconfigure.SpringBootApplication;
import org.springframework.boot.web.servlet.ServletComponentScan;
@ServletComponentScan
@SpringBootApplication
public class SpringBootServletApplication {
public static void main(String[] args) {
SpringApplication.run(SpringBootServletApplication.class, args);
}
}
5. 启动 Spring Boot,控制台日志出入如下。
. ____ _ __ _ _
/\\ / ___'_ __ _ _(_)_ __ __ _ \ \ \ \
( ( )\___ | '_ | '_| | '_ \/ _` | \ \ \ \
\\/ ___)| |_)| | | | | || (_| | ) ) ) )
' |____| .__|_| |_|_| |_\__, | / / / /
=========|_|==============|___/=/_/_/_/
:: Spring Boot :: (v2.5.1)
2021-06-23 14:07:04.202 INFO 10200 --- [ main] n.b.www.SpringBootServletApplication : Starting SpringBootServletApplication using Java 1.8.0_131 on LAPTOP-C67MRMAG with PID 10200 (D:\spring-boot-servlet\target\classes started by 79330 in D:\spring-boot-servlet)
2021-06-23 14:07:04.205 INFO 10200 --- [ main] n.b.www.SpringBootServletApplication : No active profile set, falling back to default profiles: default
2021-06-23 14:07:05.169 INFO 10200 --- [ main] o.s.b.w.embedded.tomcat.TomcatWebServer : Tomcat initialized with port(s): 8080 (http)
2021-06-23 14:07:05.180 INFO 10200 --- [ main] o.apache.catalina.core.StandardService : Starting service [Tomcat]
2021-06-23 14:07:05.180 INFO 10200 --- [ main] org.apache.catalina.core.StandardEngine : Starting Servlet engine: [Apache Tomcat/9.0.46]
2021-06-23 14:07:05.245 INFO 10200 --- [ main] o.a.c.c.C.[Tomcat].[localhost].[/] : Initializing Spring embedded WebApplicationContext
2021-06-23 14:07:05.245 INFO 10200 --- [ main] w.s.c.ServletWebServerApplicationContext : Root WebApplicationContext: initialization completed in 984 ms
MyListener 到 ServletContext 初始化MyFiler 初始化2021-06-23 14:07:05.543 INFO 10200 --- [ main] o.s.b.w.embedded.tomcat.TomcatWebServer : Tomcat started on port(s): 8080 (http) with context path ''
2021-06-23 14:07:05.550 INFO 10200 --- [ main] n.b.www.SpringBootServletApplication : Started SpringBootServletApplication in 1.853 seconds (JVM running for 2.764)
MyFiler doFilter
由以上日志输出可以看出,自定义的过滤器 Filter 和 器 Listener 都已经生效。
6. 浏览器访问“http://localhost:8080/myServlet”,结果如下。
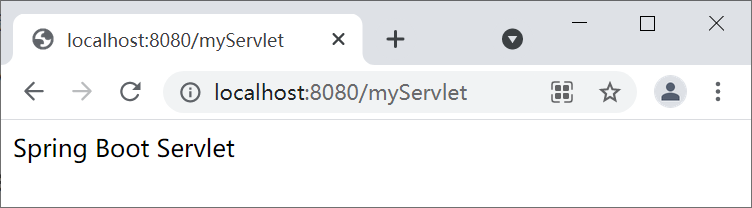
图1:Spring Boot 注册 Servlet
由上图可知,自定义的 Servlet 也已经生效了。
使用 RegistrationBean 注册
我们还可以在配置类中使用 RegistrationBean 来注册原生 Web 组件,不过这种方式相较于注解方式要繁琐一些。使用这种方式注册的原生 Web 组件,不再需要使用 @WebServlet 、@WebListener 和 @WebListener 等注解。RegistrationBean 是个抽象类,负责将组件注册到 Servlet 容器中,Spring 提供了三个它的实现类,分别用来注册 Servlet、Filter 和 Listener。
ServletRegistrationBean:Servlet 的注册类
FilterRegistrationBean:Filter 的注册类
ServletListenerRegistrationBean:Listener 的注册类
我们可以在配置类中,使用 @Bean 注解将 ServletRegistrationBean、FilterRegistrationBean 和 ServletListenerRegistrationBean 添加 Spring 容器中,并通过它们将我们自定义的 Servlet、Filter 和 Listener 组件注册到容器中使用。
示例 2
1. 创建自定义 Servlet,代码如下。package net.biancheng.www.servlet;
import javax.servlet.ServletException;
import javax.servlet.http.HttpServlet;
import javax.servlet.http.HttpServletRequest;
import javax.servlet.http.HttpServletResponse;
import java.io.IOException;
import java.io.PrintWriter;
public class MyServlet extends HttpServlet {
@Override
protected void doGet(HttpServletRequest req, HttpServletResponse resp) throws ServletException, IOException {
doPost(req, resp);
}
@Override
protected void doPost(HttpServletRequest req, HttpServletResponse resp) throws ServletException, IOException {
resp.setContentType("text/html;charset=UTF-8");
PrintWriter writer = resp.getWriter();
writer.write("Spring Boot Servlet");
writer.close();
}
}
2. 创建自定义的 Filter,代码如下。
package net.biancheng.www.filter;
import javax.servlet.*;
import java.io.IOException;
public class MyFiler implements Filter {
@Override
public void init(FilterConfig filterConfig) throws ServletException {
System.out.println("MyFiler 初始化");
}
@Override
public void doFilter(ServletRequest request, ServletResponse response, FilterChain chain) throws IOException, ServletException {
System.out.println("MyFiler doFilter");
chain.doFilter(request, response);
}
@Override
public void destroy() {
System.out.println("MyFiler 销毁");
}
}
3. 创建自定义的 Listener,代码如下。
package net.biancheng.www.Listener;
import javax.servlet.ServletContextEvent;
import javax.servlet.ServletContextListener;
// ServletContext 的初始化和销毁过程
public class MyListener implements ServletContextListener {
@Override
public void contextInitialized(ServletContextEvent sce) {
System.out.println("MyListener 到 ServletContext 初始化");
}
@Override
public void contextDestroyed(ServletContextEvent sce) {
System.out.println("MyListener 到 ServletContext 销毁");
}
}
4. 创建一个配置类 MyConfig,使用 @Bean 注解将 ServletRegistrationBean、FilterRegistrationBean 和 ServletListenerRegistrationBean 添加到 Spring 容器中,并分别使用它们注册我们自定义的 Servlet、Filter 和 Listener,示例代码如下。
package net.biancheng.www.config;
import net.biancheng.www.Listener.MyListener;
import net.biancheng.www.filter.MyFiler;
import net.biancheng.www.servlet.MyServlet;
import org.springframework.boot.web.servlet.FilterRegistrationBean;
import org.springframework.boot.web.servlet.ServletListenerRegistrationBean;
import org.springframework.boot.web.servlet.ServletRegistrationBean;
import org.springframework.context.annotation.Bean;
import org.springframework.context.annotation.Configuration;
import java.util.Arrays;
@Configuration
public class MyConfig {
/**
* 注册 servlet
* @return
*/
@Bean
public ServletRegistrationBean servletRegistrationBean() {
MyServlet myServlet = new MyServlet();
return new ServletRegistrationBean(myServlet, "/myServlet");
}
/**
* 注册过滤器
* @return
*/
@Bean
public FilterRegistrationBean filterRegistrationBean() {
MyFiler myFiler = new MyFiler();
FilterRegistrationBean filterRegistrationBean = new FilterRegistrationBean(myFiler);
//注册该过滤器需要过滤的 url
filterRegistrationBean.setUrlPatterns(Arrays.asList("/myServlet"));
return filterRegistrationBean;
}
/**
* 注册器
* @return
*/
@Bean
public ServletListenerRegistrationBean servletListenerRegistrationBean() {
MyListener myListener = new MyListener();
return new ServletListenerRegistrationBean(myListener);
}
}
5. 启动 Spring Boot,控制台日志出入如下。
. ____ _ __ _ _
/\\ / ___'_ __ _ _(_)_ __ __ _ \ \ \ \
( ( )\___ | '_ | '_| | '_ \/ _` | \ \ \ \
\\/ ___)| |_)| | | | | || (_| | ) ) ) )
' |____| .__|_| |_|_| |_\__, | / / / /
=========|_|==============|___/=/_/_/_/
:: Spring Boot :: (v2.5.1)
2021-06-23 14:39:16.338 INFO 8684 --- [ main] n.b.www.SpringBootServletApplication : Starting SpringBootServletApplication using Java 1.8.0_131 on LAPTOP-C67MRMAG with PID 8684 (D:\spring-boot-servlet\target\classes started by 79330 in D:\spring-boot-servlet)
2021-06-23 14:39:16.340 INFO 8684 --- [ main] n.b.www.SpringBootServletApplication : No active profile set, falling back to default profiles: default
2021-06-23 14:39:17.059 INFO 8684 --- [ main] o.s.b.w.embedded.tomcat.TomcatWebServer : Tomcat initialized with port(s): 8080 (http)
2021-06-23 14:39:17.069 INFO 8684 --- [ main] o.apache.catalina.core.StandardService : Starting service [Tomcat]
2021-06-23 14:39:17.070 INFO 8684 --- [ main] org.apache.catalina.core.StandardEngine : Starting Servlet engine: [Apache Tomcat/9.0.46]
2021-06-23 14:39:17.138 INFO 8684 --- [ main] o.a.c.c.C.[Tomcat].[localhost].[/] : Initializing Spring embedded WebApplicationContext
2021-06-23 14:39:17.138 INFO 8684 --- [ main] w.s.c.ServletWebServerApplicationContext : Root WebApplicationContext: initialization completed in 766 ms
MyListener 到 ServletContext 初始化MyFiler 初始化2021-06-23 14:39:17.390 INFO 8684 --- [ main] o.s.b.w.embedded.tomcat.TomcatWebServer : Tomcat started on port(s): 8080 (http) with context path ''
2021-06-23 14:39:17.396 INFO 8684 --- [ main] n.b.www.SpringBootServletApplication : Started SpringBootServletApplication in 1.379 seconds (JVM running for 2.19)
由以上日志输出可以看出,自定义的过滤器 Filter 和器 Listener 都已经生效。
6. 浏览器访问“http://localhost:8080/myServlet”,结果如下图。
图1:Spring Boot 注册 Servlet
由上图可知,自定义的 Servlet 也已经被注册生效了。
- 随机文章
- 风儿(风儿轻轻的吹)
- 饿了么红包怎么用(饿了么红包怎么用微信支付)
- 儿童教育文章(儿童教育)
- 光遇花手先祖位置(安卓光遇手花先祖)
- 广州4a广告公司(广州4a广告公司创意总监年薪)
- 抖音卡(抖音卡顿怎么解决)
- xboxones(xboxone手柄怎么配对主机)
- 兵马俑(兵马俑介绍和历史背景)
- 陈武简历
- 帆船比赛(帆船比赛视频)
- 海猫鸣泣之时游戏(海猫鸣泣之时游戏在哪玩)
- 韩国媳妇和小雪(韩国媳妇和小雪的父亲工资是多少)
- 儋州市第二中学(儋州市第二中学录取分数线)
- 地球日主题(2020年世界地球日主题)
- 和柳亚子(和柳亚子先生于田)
- 冰客(冰客果汁)
- yy魔兽(yy魔兽世界)
- 国外成人游戏(国外成人游戏注册需要visa信用卡)
- 充值卡代理(充值卡代理加盟)
- 拆奶罩
- 东天目山(东天目山景区)
- 杭同(杭同培训中心怎么样)
- 大松电饭煲(美的大松电饭煲)
- 服饰加盟(服饰加盟店招商)
- 点对点短信息(点对点短信息费是什么意思)
- 观音普门品(观音普门品念诵全文)
- 河北省大运会(河北省大运会时间)
- 哈利波特官网(哈利波特官网在哪里)
- 骇客神条(骇客神条怎么辨别真假)
- 查传倜(查传倜个人生活)